The Ultimate 7-Step UX Design Process Guide
Yellow Slice
The UX of a businesss digital products makes or breaks revenue. Dont take our word for it, though. Brands like Airbnb owe half their success to good UX. Like every good dish needs a recipe, every design needs a well-defined UX design process. If a design team tells you they will figure out the steps along the way, we say: face the opposite direction and RUN.
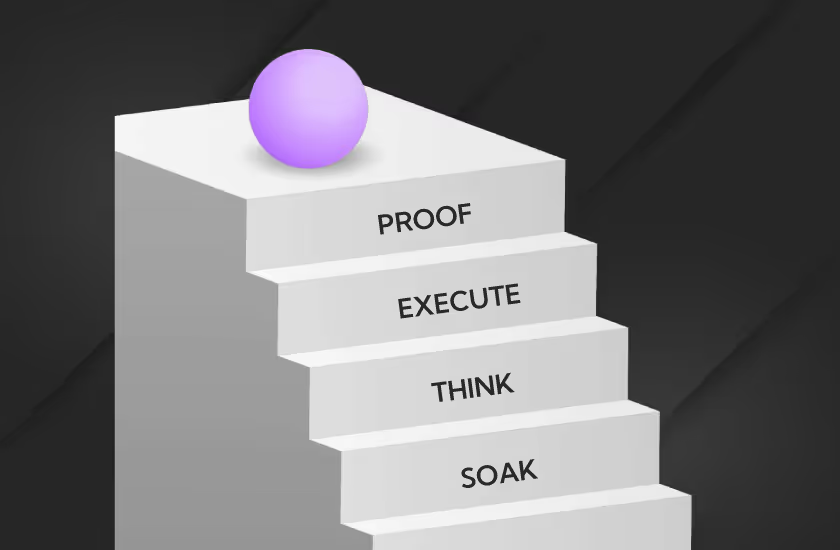
We at Yellow Slice have been following a four-stage process for nearly two decades, which we call STEP (Soak, Think, Execute, and Proof). The four stages are further divided into a seven-step process that we swear by, as it has delivered fantastic results in the past with brands that can vouch for us.Omkar Phopale is a UX designer at Yellow Slice who emphasises the importance of a UX design process and said, ??Like you shouldnt go on a holiday without the itinerary, you shouldnt start designing a UX journey without a well-thought-out process. I highly believe in defining a process that works for you once and keep practising it.
What is UX Design?

User Experience (UX) is the process that design teams use to create a meaningful and satisfying experience for users of a product design. The process includes steps that help design the user journey with high functionality and usability. UX design makes sure that the product design doesnt just look good on the outside but also works smoothly.Sounds too technical? UX design is a highly misconstrued field, allow us to explain it in the most layman's language possible, like how we would explain it to a toddler.Imagine a bowl of cereal. Many factors influence the desirability, usability, and usefulness of eating the cereal (experience).Is the cereal crunchy enough? How much cereal can the spoon hold? Whats the size of the bowl? Is the cereal spilling outside the bowl?These factors must be optimised so the user can enjoy cereal. Similarly, a good UX design fulfils the user's expectations and makes using the product design user-friendly.
What is a UX Design Process?
The UX design process is a series of strategic steps a design team takes to create a successful, user-friendly design. It is a roadmap that guides designers, backed by research, user feedback, and objectives.The process includes research, prototyping, testing, and refining through usability testing and surveys.An efficient UX design process doesnt end when the sale is made; it designs the user's entire experience related to the product, the marketing campaign, the packaging, and after-sales support.
Why is a UX Design Process Important?
Some people use UX design interchangeably with good business, and though its not literally true, we dont entirely disagree. Elon Musk rightly said, Any product that needs a manual is broken.An app or a website should guide the user on how to use it independently, even when the user is not tech-savvy. Below, we have mentioned reasons for what good can such a UX design do for your business,
- Design products are the first touchpoints of every business for users. In most cases, if businesses see this opportunity and take advantage of it, users will not leave a brand beyond this first step without making a purchase.
- Without the UX design process, the designers will be left with biases and assumptions to guide them through the design process, though thats not bad. A design process is more research-packed, as it uses design psychology.
- Thanks to the set protocols in the design process, the risk of continuous reworking is reduced, which also requires an extra budget.
- When the design process is divided into steps, it becomes easier for stakeholders and respective authorities to track the projects success with little design experience.
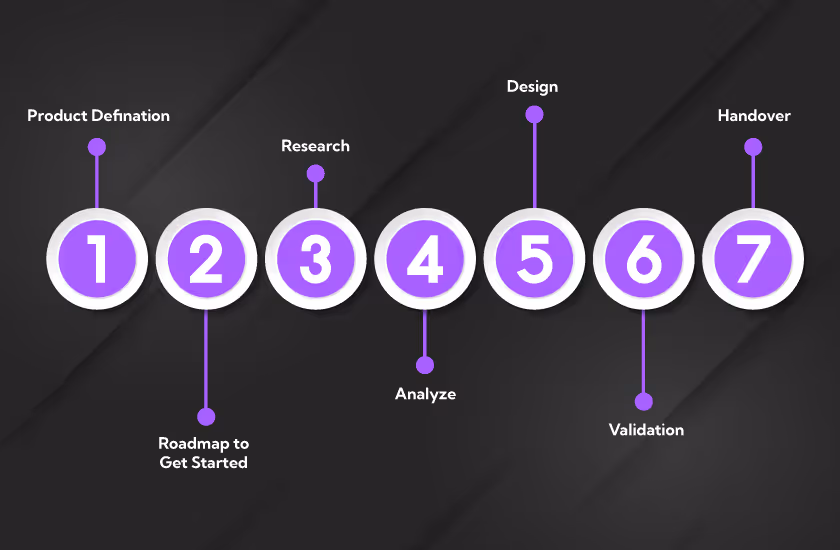
7 Steps UX Design Guide: By Yellow Slice
The seven steps are divided into four stages, as we mentioned before: STEP (Soak, Think, Execute and Proof)
- Soak
At this stage, we absorb the information and familiarise ourselves with the project, business, and stakeholders.
Step 1: Understanding the Problem
Can you solve a problem without knowing it? Dont answer; thats a rhetorical question.Understanding the problem statement is the foundation of solving any UX problem. This allows you to tweak the existing UX design process around the problem.Determine what needs to be created and why. The stronger and more precise your why is, the more apt your end product will be.Answer questions like: Why does this product need to exist?Who are you creating this for?What business problems will this solve?Utilise stakeholder interviews to come up with answers to these questions, and youll end up with a set of specs and a low-fi concept sketch to work with.
Define Business Goals and User Needs
Define clear objectives and develop a shared understanding with stakeholders, developers, and clients about the project's success so everyone is on the same page. As the project unfolds, clarify any unreasonable goals to achieve and suggest what more can be done beyond the suggestions.Answer questions to provide a structured framework, like: What is the scope of the project?What are the boundaries and limitations of resources in the project?What are the essential features needed?What are the user requirements?What does this project aim to accomplish?
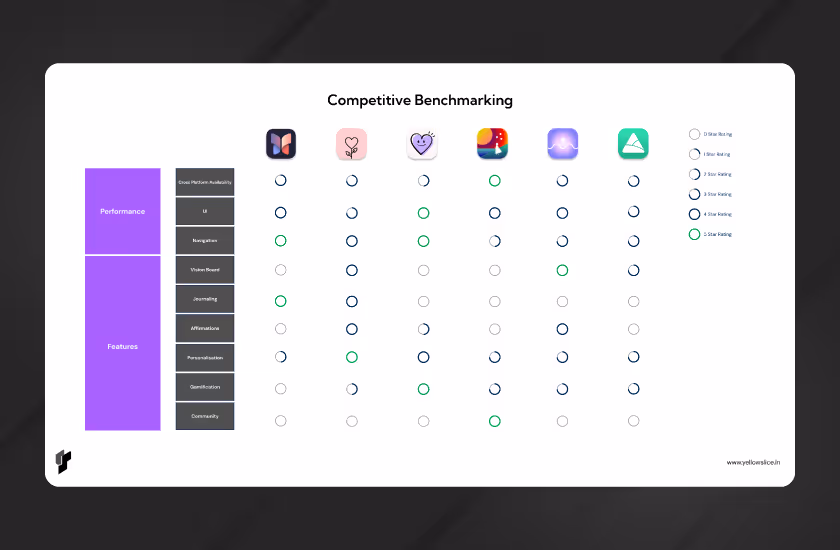
Do Competitor Analysis
A little competition is good, but severe competition is a blessing. If the product you are dealing with has a lot of competitors, dont fret. Just think of them as a bigger sample size youve got on your lap for research purposes.Rivals help you understand industry standards, potential gaps, and opportunities for innovation. Make what no one has ever thought possible. Use their right doings for your advantage and their wrongdoings as your lesson.
Perform User Research
If you dont know who you are creating for, you essentially create a product aimed at no one. So, you better use analytics, surveys, and interviews to get to know your users, their feelings, and their pain points about this product.Delve into user behaviour, expectations, needs, and habits to get insights. Think like a psychologist and uncover information about them that even they are unaware of.
Methods and techniques for user research:
InterviewsSurveysFocus GroupsEthnographic StudiesFormsHeatmapsMarket ResearchUsability TestsCustomer Journey Mapping
2. Think
In this stage, we analyse the information we have collected to gain valuable insights.
Turn Research Into Insights
All the data, methods, and techniques will be useless if you dont synthesise the information into actionable insights. During this phase, user personas, user stories, wireframes, and other high-level plans are planned. Technologies and resources that will be used to achieve milestones are also decided in this stage.
Step 2: Creating User Personas & Empathy Maps
Understanding users is a vital step, and thats what we will do next.
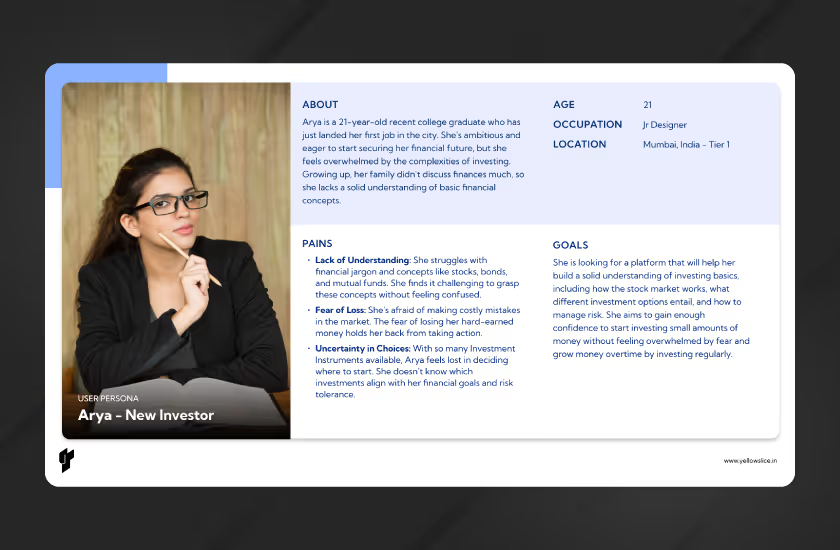
Create User Personas
Imagine a person who will use the design you are creating. Create this person's personality, including his/her age, gender, location, thinking patterns, frustrations, and what influences him/her.Give life to data by creating a user persona. Now, design the UX for this fictional character. If you research correctly, the UX will eventually find an audience when it lands in the market.
Empathy Mapping
Empathy mapping is a collaborative visualisation technique used in UX design. It involves designers using empathy for customers to understand their emotions, behaviours, and thoughts.An empathy map consists of four components: what the user says, thinks, does, and feels. Designers step into users' shoes to ensure the design is functional and emotionally resonant. This goes beyond demographics or primary personas. Visual aids and digital templates can be used to create empathy maps.
3. Execute
Now, we take our guns out, and we head to the execution part.
Step 3: Information Architecture (IA) & User Flows
The architecture of a website or an app should be designed so that users flow naturally in the path.
What is Information Architecture?
In UX design, Information Architecture (IA) refers to organising and structuring a product's content, such as a website or app, so that users find it easy to navigate. Use the information you collected during the research process to create a clear hierarchy and structure.Label and present the information in an organised way so that you can design the process in a structured way and allow users to understand the information quickly.
Key Elements of Information Architecture:
Hierarchical Structure: Arrange the content logically into main categories and subcategories. Organise pages in a sequence that users expect.
Navigation: A well-designed IA is easy and quick for users to navigate.
Labelling: Labels should be clear and concise, free of jargon and technological terms, and easy for users to understand.
Content Grouping: Group related content or features together to reduce cognitive load.
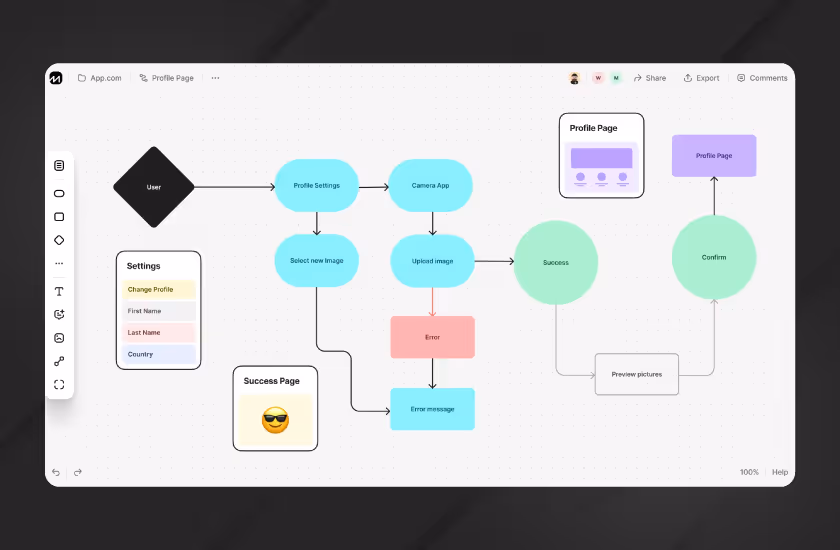
Craft User Flows
Imagine your website as a piece of land. For users to move from place A to place B, the design team must create a map or flow to guide their path. Now, these flows are to be created so that its easy for users to navigate. Best practices that designers can incorporate to make this flow include,Use diagrams or flowcharts to visualise the steps the user takes.Test the flow with users and refine it as you get the feedback.Dont make it complex just for the sake of being different.Consider all possible permutations and combinations of pathways and test them with A/B testing.Anticipate information that users need, such as an email or username.Use software tools like Lucidchart or Miro to create user flows.
Step 4: Wireframing & Prototyping
Wireframes and prototypes are the rough first draft of the final UX design.
Low-fidelity Wireframes Work Best
After creating user flows, it's time to create wireframes. Wireframes are the skeletal structure of the interface that shows how it will function. In simple terms, wireframes are like a blueprint for the design.There are two types of wireframes: Low-fidelity and high-fidelity wireframes. Low-fidelity wireframes are for basic design elements, and high fidelity are for more complex and intricate design elements.Low-fidelity wireframes are best in most situations as they are quick to create, especially for the first few steps, when your aim should be to get the ideas on paper. They have simple shapes and symbols that are clear enough to translate the basic layout of the design before moving to visuals.
Tools to Use For Creating Wireframes:
SketchBalsamiqWireframe.ccFigma
Convert Wireframes into Prototypes
After sketching out some initial wireframes, it's time to start making interactive prototypes. Prototypes are simplified versions of a product or interface used to test its functionality and usability before making the final product.
Tools To Use For Creating Prototypes:
InVision StudioAdobe XDWebflowAxure RPOrigami StudioJustinmindMaze
4. Proof
To solidify our plan, we prove it by making it work towards the end of the process.
Step 5: Usability Testing
Usability testing is done to know whats on the user's mind.
Types of Usability Testing
Different types of usability testing are divided based on various factors. You have to pick and choose among these methods according to your convenience and project needs.Remote TestingIn-person TestingAs the name suggests, participants and researchers are not in the exact location of remote testing.The researcher and participants are in the same location, and physical cues can be observed.Online tools are used, and they are cost-efficient. Thanks to technology.A small sample size is under study as it can be costly.Moderated TestingUnmoderated TestingIn moderated testing, a coordinator deals with the participants solves their queries, or asks questions.In unmoderated testing, participants' actions are not controlled or guided and usually involve testing tools like UXtweak.This allows real-time feedback but can also incorporate bias.It is easier to manage, is very flexible, and requires much less time.Qualitative TestingQuantitative TestingQualitative testing gathers data that tells participants' subjective experiences and highlights why they interact with a product.Quantitative testing focuses on gathering numerical data about users and their journey in terms of metrics.Information gathered from this method can be challenging to analyse and summarise.Information gathered from this method is facts and proven data.Standard methods, such as unmoderated usability tests, session recording, and guerilla usability testing, are used to gather qualitative information.Some standard methods of collecting quantitative data include card sorting, tree testing, A/B testing, and surveys.
Preparing for a Usability Test
But how do you start with preparing for usability tests?Start by asking users to complete a task and brush off the biases in the tone of instruction so that their journey is not influenced by bias. Recruit participants via email newsletters or social media. Keep your priorities straight and test for the most important functionalities.
Analysing and Synthesising Test Results
The results will illuminate your understanding of users' difficulties. Conduct a thorough analysis of a pattern of user journey. Report your findings and use the results to illuminate your understanding of users' difficulties.
Step 6: UI Design & Visual Elements
Now is the time to bring wireframes to life.
Cohesive Design Systems & Style Guides
The wireframes youve built will now help you design the UI. The cohesive design adds aesthetics, including typography, colour, and imagery, that make the product visually appealing.The design must reflect the brand's identity at this stage while enhancing usability. Make sure the style is consistent and uniform.
Step 7: Handoff to Developers & Continuous Improvement
Heres to the final stage, where we give the final finish.
Preparing for Handoff
Thanks to tools like Figma, design handoffs are no longer a nightmare. When designers do their best to create a UX design and prepare a handoff for the developers to build, it should be comprehensive and understandable. Developers should be able to access different versions of the design.
Post-launch UX Analysis
The process doesn't end after the UX has been launched. For the project to be at its best, a thorough analysis of how the functionalities are being performed and constant reiterations are needed.
How Yellow Slice Helped Optimus to Ace their UX Design
Optimus Information is a leading technology consulting company providing professional and managed services.The Problem: Optimus requested that we create a desktop application so that they can monitor and test their hardware continuously for optimal performance.The Solution: Designers at Yellow Slice constructed a desktop application from inception. The application has a clean interface reflecting the brand's identity. Users can effortlessly establish controls, allocate assets, and add users to execute a test on a specific piece of hardware in a designated location.Optimus has worked on over 500 projects, and they stand tall with a rating of 4.1 out of 5.
Experience Slice of Designing at Yellow Slice?
Having worked with big names like Make My Trip, NPCI, Axis Bank, and Croma (and the list is long), we have picked up best practices for designing a UX. We take pride in advancing the human experience and deriving results for business with intuitions and facts.Ready to get a slice of digital experience? Visit our service page, and lets start designing your success today.
FAQs
1. What are the seven components of UX?
There are seven components of UX design: usefulness, desirability, accessibility, credibility, findability, usability, and value. If the design team does justice to these seven components and incorporates them while designing UX, then it can do wonders for the company.
2. What is the UX design process that an expert follows?
The UX design process is a series of steps designers follow to create a user-friendly interface for a product. The process varies by project, but it typically includes the following steps: defining the objectives, researching user requirements and issues, analysing the data, developing the product, and testing it.At Yellow Slice, we follow a four-step process called STEP (Soak, Think, Execute, Proof). Visit our website to learn about our design services.


Let's create something amazing!
Let's discuss your vision and how we can bring it to life with impactful design solutions.
.avif)
Good design starts with Sliced Newsletter
Subscribe to the Sliced newsletter and get the best of research, UX writing, product psychology, CX, and design systems, right in your inbox.
